Start at the front of the car disconnecting the battery earth lead and removing the clutch cover. Also take off the air mass meter and store it somewhere safe - it is delicate and expensive. Do NOT be tempted to spray carb cleaner or anything else on the very thin wire sensor element. Leave well alone!
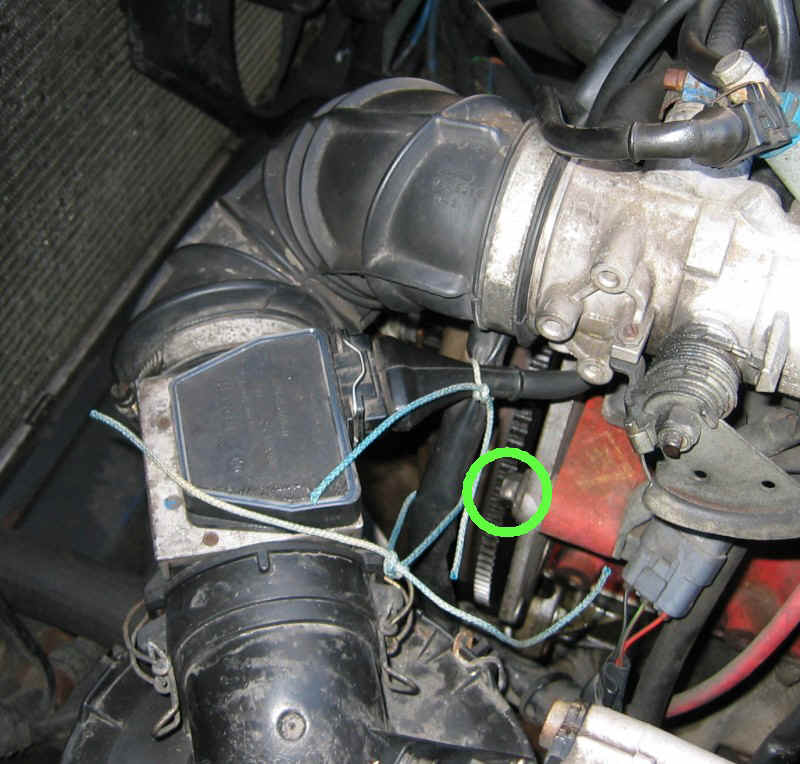
The bolt circled in green is now accessible and makes a convenient leverage point for a tool used to prevent the flywheel turning.

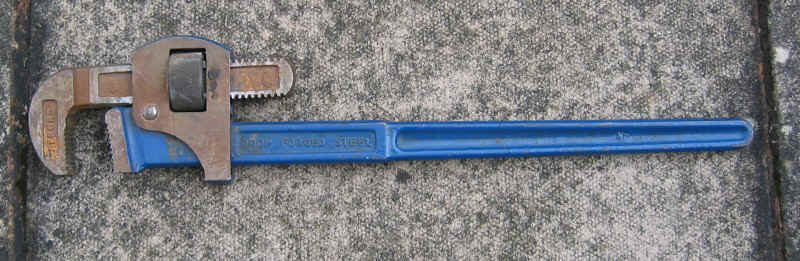
You can see some of the teeth marks on my 17/16" socket.
Once the Stilson is nicely locked on the socket and ready to be turned, simply jam a suitable piece of mild steel into one of the starter ring gear teeth (see previous photo for leverage point) and the nut is easily undone - a simple one man job. It has a conventional right hand thread.
Never throw anything away if it might be useful in the next 30 years!
Soft mild steel is ideal for 'locking' the flywheel teeth as there is less chance of chipping a tooth.

And be especially careful not to damage the crankshaft position sensor - they can prove difficult and expensive to repair or replace.
Some pulleys on French cars (Citroens for example....) can fail after only a few years.
Leave the metal ring alone apart from gentle washing. If it is damaged or distorted the CPS may be destroyed when the crankshaft is next rotated.
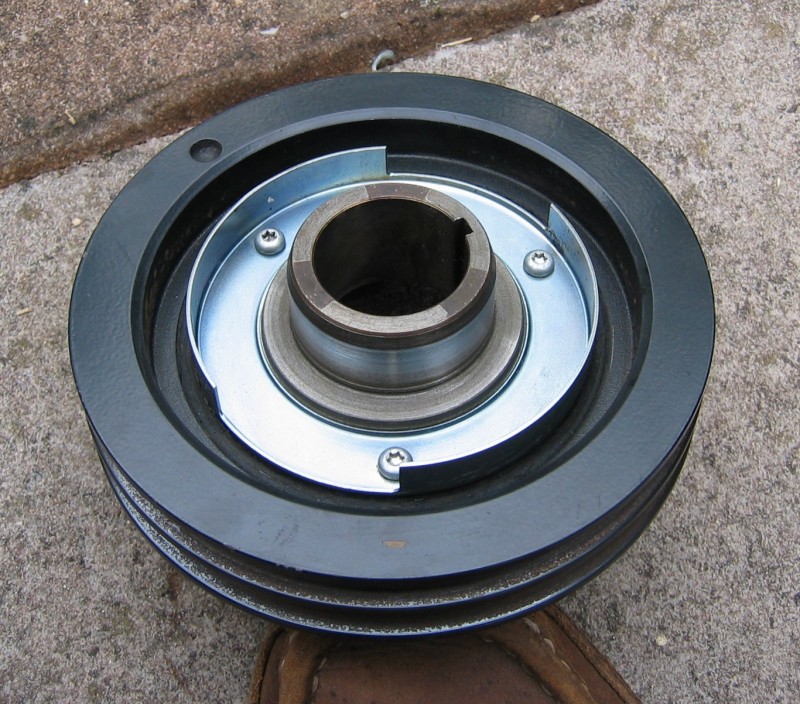
Two small Torx20 screws hold the CPS onto the oil pump body. One screw is visible with the pulley in position, the other is hidden. Be careful not to lose these small screws into the engine when you unscrew them: you can't see one of the screws without using a small mirror. It is advisable gently to pack around the crankshaft and into the space around the oil seal with a strip of bubblewrap or similar - if a T20 screw falls out it may fall into the oil pump.
Do not use any force in removing the CPS.
The working face of the pulley (where the oil seal runs) can be cleaned with VERY FINE
and OLD (used) wet and dry paper used wet with some paraffin. This will remove any glaze
that can stop a new seal working correctly.
Do NOT oil the seal where it pushes into the casing of the oil pump. It should be
installed dry.
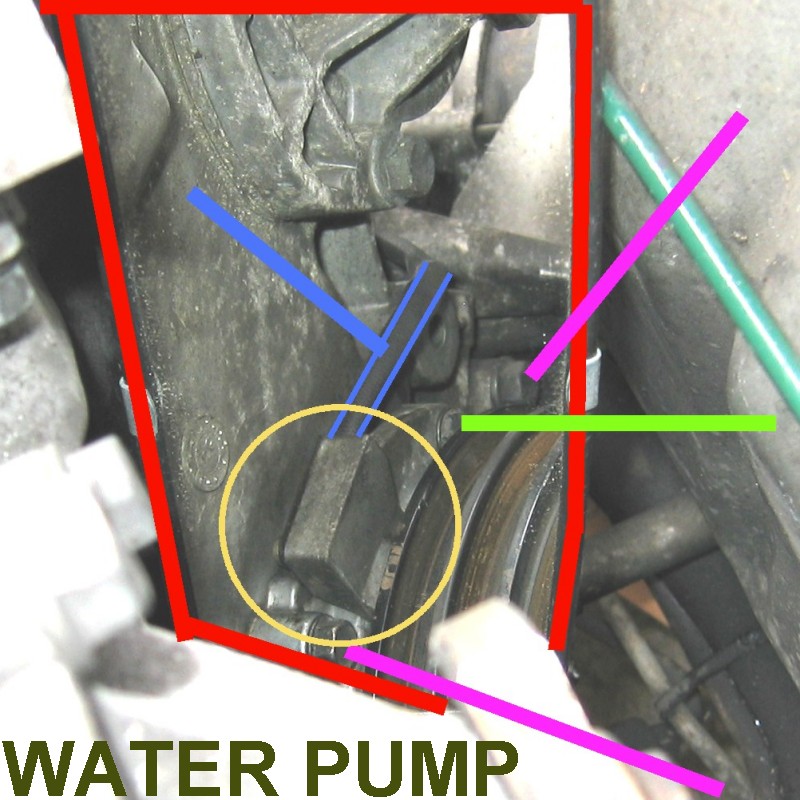
The red outline is the mirror - everything you see inside the red outline is a mirror image of reality.
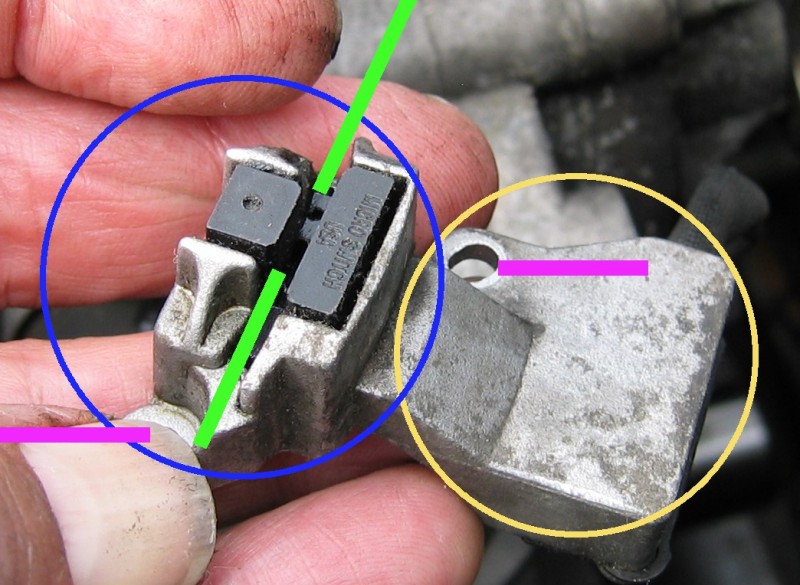
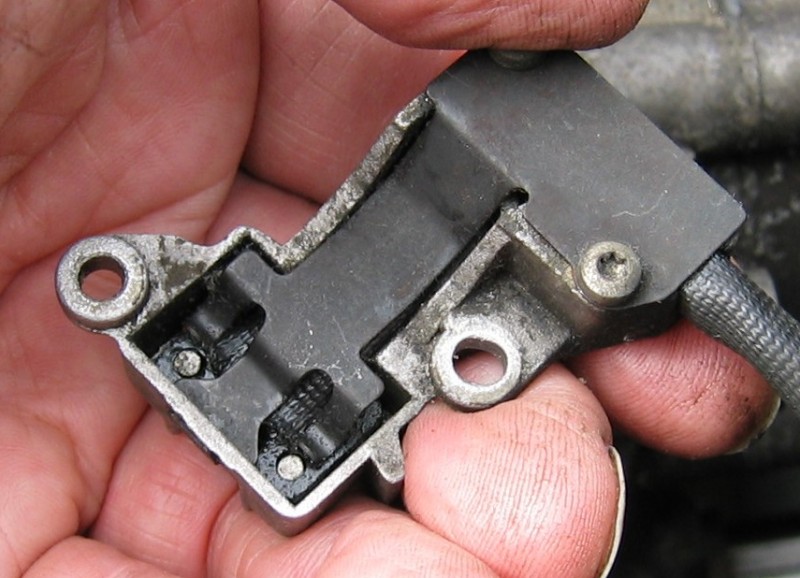
The housing for the CPS is circled in yellow.
Two of the many small bolts holding the oil pump casing in position are designated by purple lines. These bolts do not hold the CPS in place.
One of the small T20 screws is shown by the green line, the other is hidden (and difficult to see even when the pulley is removed). Be careful with the CPS.
The blue lines show the wiring for the CPS.
As of Dec 2014 the following links may help source a replacement CPS - or you can buy a kit from Saabbits in Devon (UK) for around �100.
These sensors used to be sold by FARNELL under part number 178877 but this is discontinued. The sensors were made by HONEYWELL under part number 4av16f. This was replaced by 4av19f but this too is hard to source as a single item.
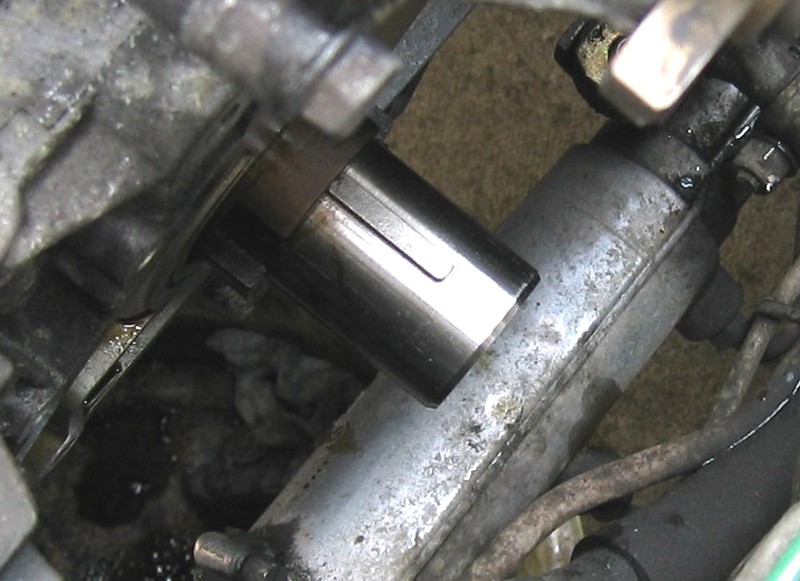
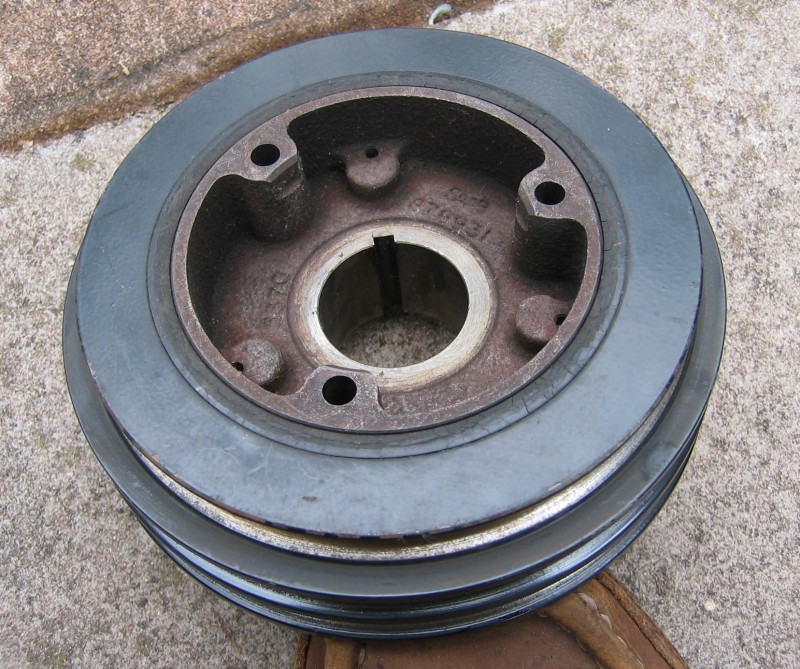
The bright metal ring on the underside of the crankshaft pulley rotates in the slot and the presence or absence of the metal is what sends a signal to the ECU.
The purple lines show the position of the two small T20 screws.
Do not overtighten them.
Do not remove this screw - leave well alone. You remove it only to replace a defective sensor chip.
Many good Saab cars were scrapped because garages could not obtain a new sensor. The same part is used on some Saab 9000 models. Without a proper test rig it is not possible comprehensively to test a sensor. Often they fail only when you try and start a hot engine.
If you manage to purchase a new sensor but are not confident to fit it yourself I could do it for you at a modest cost. ALWAYS connect red to red and black to black (there are three wires in total), then connect the third one. It is the red and black colours that must match.

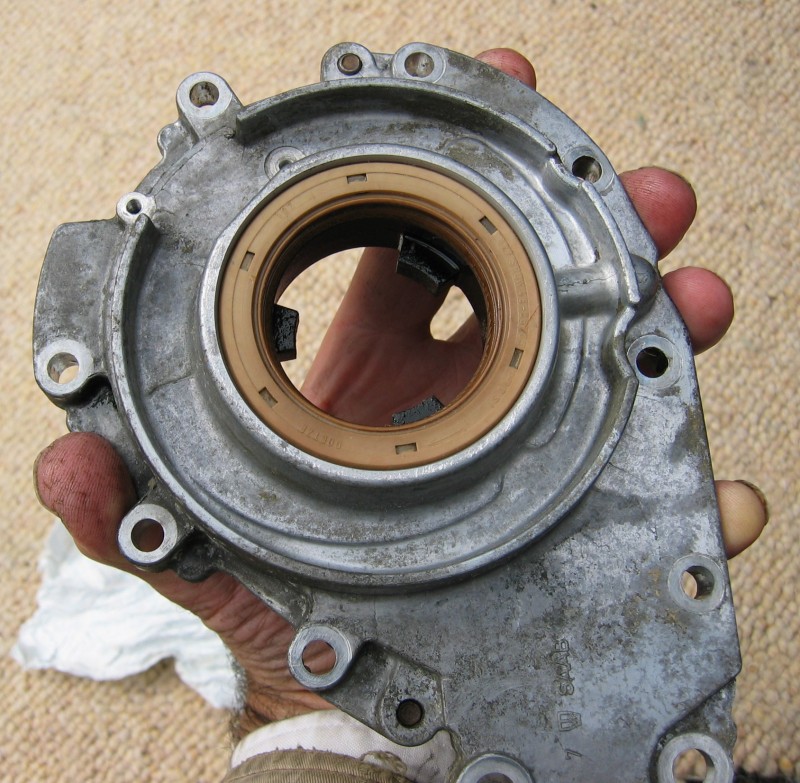
A small amount of oil will drain out when the pump is gently prised off from the engine block. The correct way to put it back together is with the punched dot (red circle) showing.
Oil leakage usually occurs via the large O ring seal (the new one is shown green, this having just been fitted into the groove). Great care is needed when reinstalling the pump to make sure the O ring seal does not 'pop out' of its groove.
The two pegs (shown purple) are important for accurate location of the pump and should be cleaned with fine abrasive paper so they are a smooth sliding fit. This can be checked before the new O ring is installed.
The yellow circles show the three lugs that are driven direct from the crankshaft - earlier 8 valve Saab 900s had only one lug, and nowhere to locate a CPS, the timing being set manually at the distributor. On later cars with an EZK ignition system the CPS and the ECU control the timing: there is no manual adjustment. The distributor body simply has to be located in about the right position to transfer the EHT pulses to the plugs.
The size is 48mm internal 66.65mm external x 10mm and the material should ideally be silicone rather than viton. The Elring part number is 330.965.
This one is made by Goetze and is probably silicone.Cheaper seals are generally black and may be nitrile rubber. Do NOT oil the seal where it pushes into the casing of the oil pump. The seal should be pressed in dry. A new seal can be fitted with the pump body in-situ using an easily made special tool to push it in squarely - see following photo.
The two small holes to the top left of this photo are for the T20 (Torx 20) screws securing the CPS into position.
The pump should be primed with plenty of oil - some will escape when the pump is reinstalled but enough should remain to prime the pump. The pump casing should slide on the location pegs smoothly almost up to the timing cover. If it does not, the O ring may have come out of its groove - check before trying to tighten the bolts!
Never install the pump 'dry'. Also, lubricate the seal lip with oil before refitting the crankshaft pulley, the working face of which should also be oiled.
The plywood is placed over the oil seal and this is then tightened down using the crankshaft bolt and its spacers. To drive the new seal squarely right into its housing, (a fraction of a mm below the surface of the alloy), the plywood is removed and the old oil seal used as a spacer. It is important to align this precisely before once again tightening the crankshaft bolt.
The plywood and old oil seal can then be removed and the crankshaft reinstalled. The bolt can then finally be tightened to around 130 ft.lb.