Problems fitting a Euroflow exhaust
downpipe to a Classic SAAB 900i. Removal of catalyst on Saab 900 classic.
Several different downpipes and two different types of catalysts are used on SAAB
classic 900i cars - the main difference being whether the catalyst is a 3 hole or 4 hole
type - the number of bolts used to secure the flanges at either end of the catalyst. These
photos show a 3-bolt design.
The photos show one problem that was experienced with a replacement exhaust from
Euroflow in the UK - their part number EFSB8003.
The original SAAB part number was apparently 5466214 - available from PartsforSaabs for
around Ł165.
After much searching and cross-referencing part numbers, it appeared that the correct
Euroflow part number was EFSB8003 despite this being listed for cars up to 12/91. Mine was
registered in late 1992.
I ordered one of these from "Mr Exhaust" - a company trading on ebay. The
part arrived very promptly and didn't fit.
I ended up having the crack in my old exhaust welded and hoping it would last a few
years longer.
Problems removing the catalyst bolts and lambda sensor are illustrated and explained
Details of another incorrectly machined part (this time a
set of Lockheed rear brake discs) is shown here.
A decoke and head gasket replacement of this engine is
shown here - still perfect after 3 years.
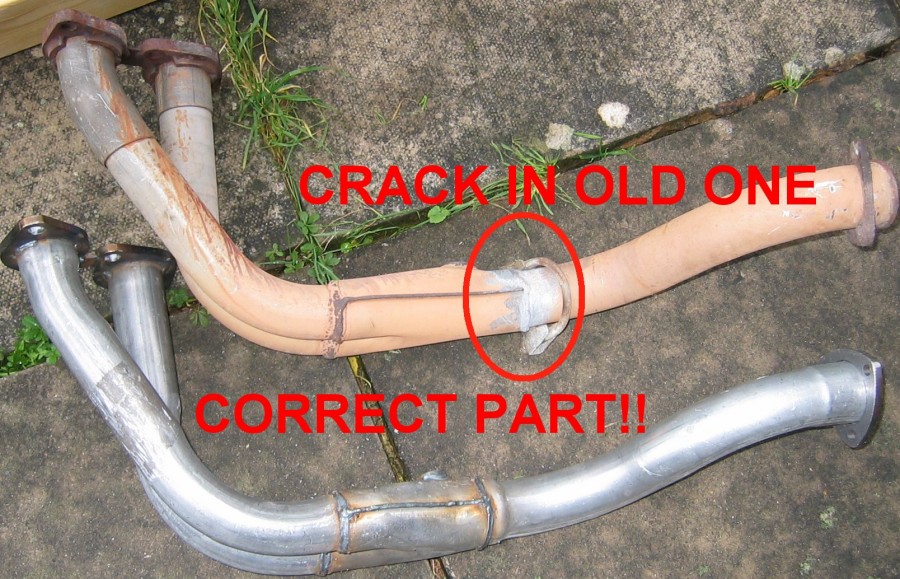 |
Location of the crack in the
original exhaust downpipe - not bad for 230,000 miles and 21 years! The replacement
Euroflow EFSB8003 part is obviously the correct one. There are several different designs,
many have a 4 bolt fixing to the catalyst. |
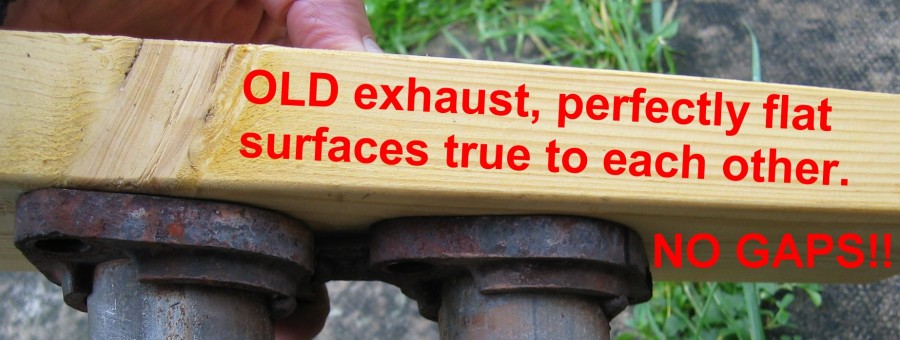 |
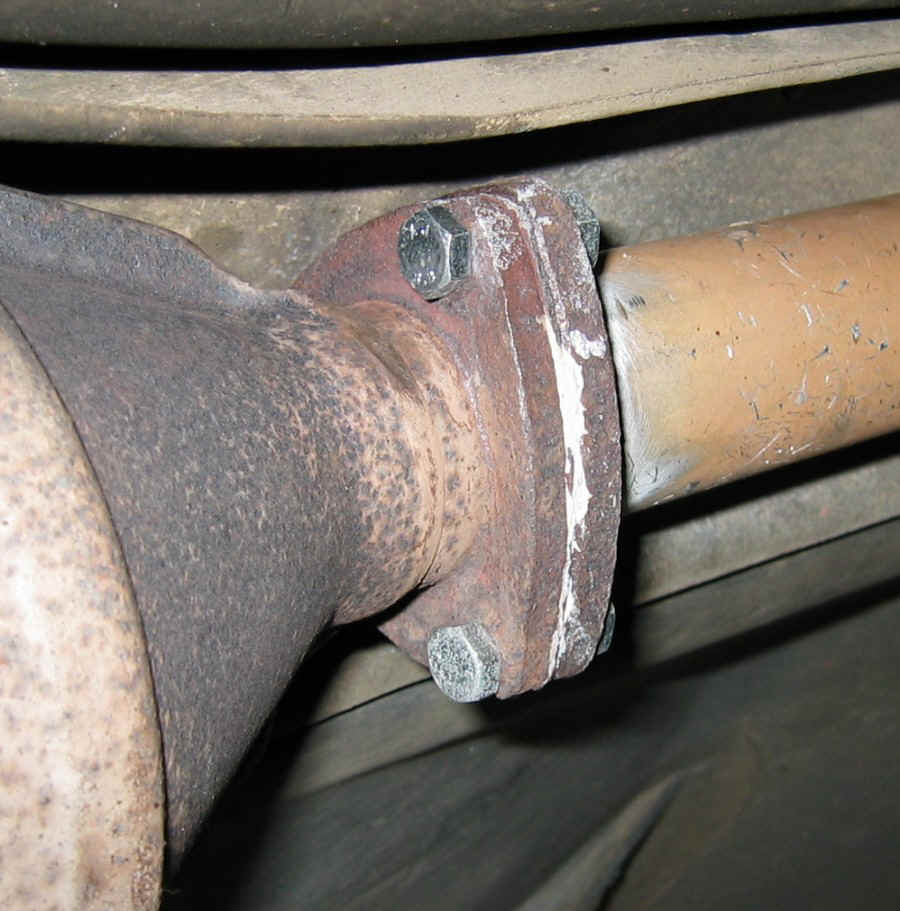
Always check this before
trying to install a new exhaust downpipe.These flanges were parallel to each other when
tested against a block of flat wood. |
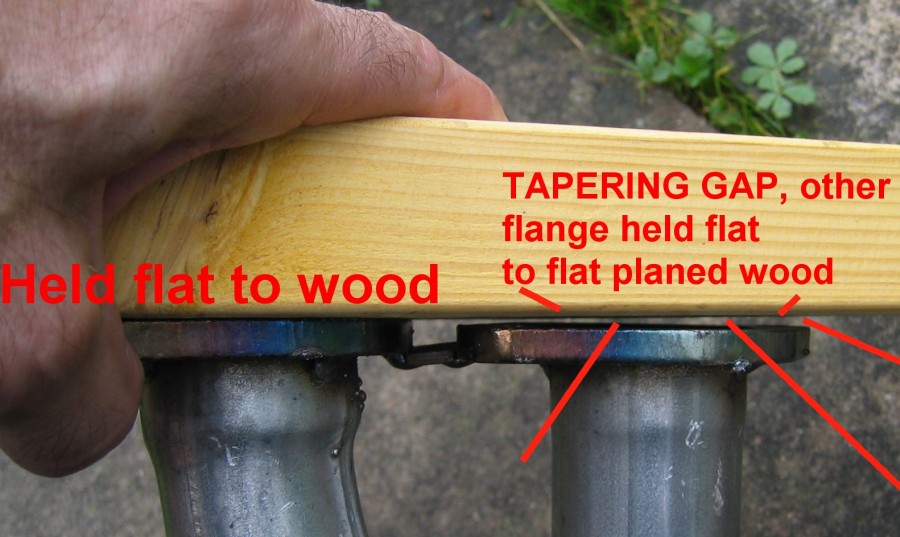 |
The new Euroflow pipe had been
manufactured incorrectly with a sizeable and tapering gap as shown This gap was far too
big to be accommodated by gaskets. |
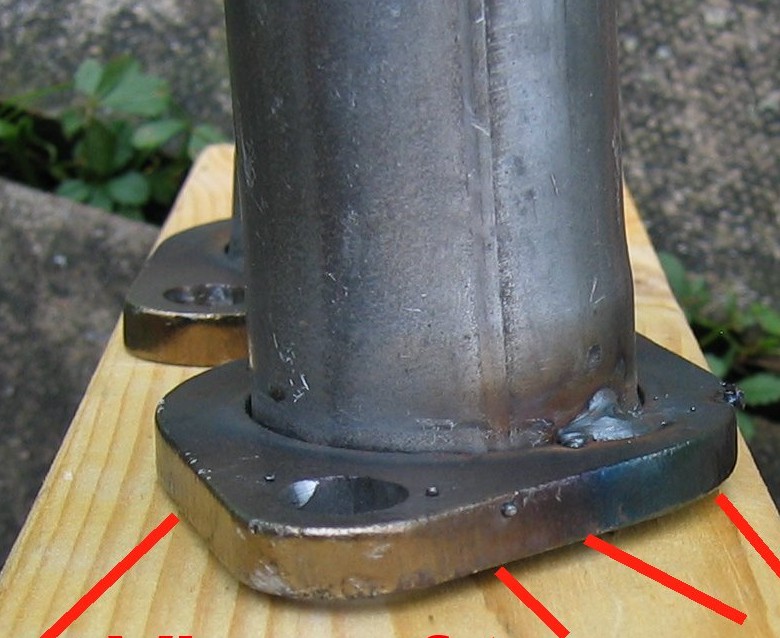 |
The faulty alignment is
clearly seen here. |
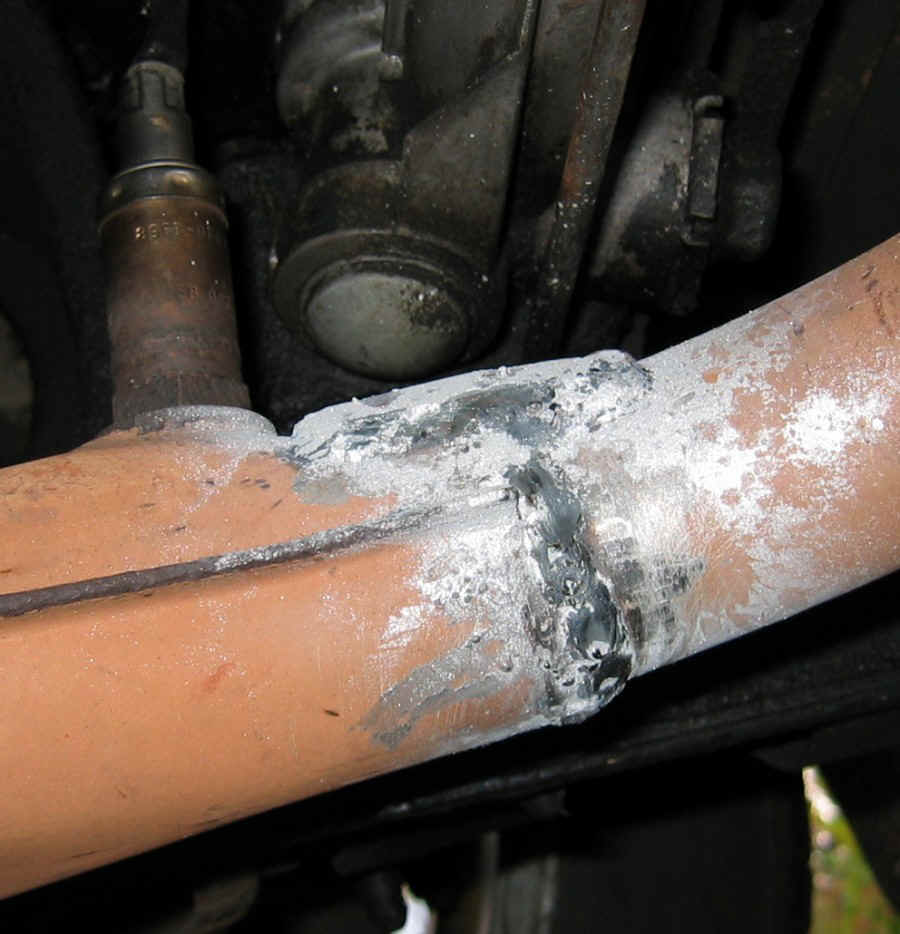 |
The crack was welded all the
way around and strengthening strips welded across the top where the crack had first opened
up. The local metal fabrication company who carried out this welding were impressed by the
condition of the pipe - at 21 years old. The Lambda sensor was replaced about a year
before this exhaust repair - even after 20 years in position it unscrewed using only an
open ended wrench - a tribute to the excellent quality of the original downpipe. The
original 3 wire lambda sensor developed a fault and caused the CHECK ENGINE light to
illuminate - after 20 years and over 220,000 miles.
It was replaced by a 4 wire design from a Ford Fiesta and has worked perfectly. The
extra (4th) wire is an additional earth - but be careful how you wire up the two white
wires - one is an earth too. You need to understand how these probes are wired before
interchanging different designs. |
 |
The rear flange of the
catalyst is 'fixed' - welded to the body of the catalyst. The bolts are simple high
tensile 8mm and easily cut off with an angle grinder using a 1mm thick cutting blade once
the whole catalyst and rear pipe can be rotated. The photo shows new bolts in position. Take
great care when using a cutting disc - it is easy to nick the thin surface of the
catalyst.
Flange surfaces and the gasket can be cleaned with a wirebrush and the gasket reused
with some exhaust gasket cement. |
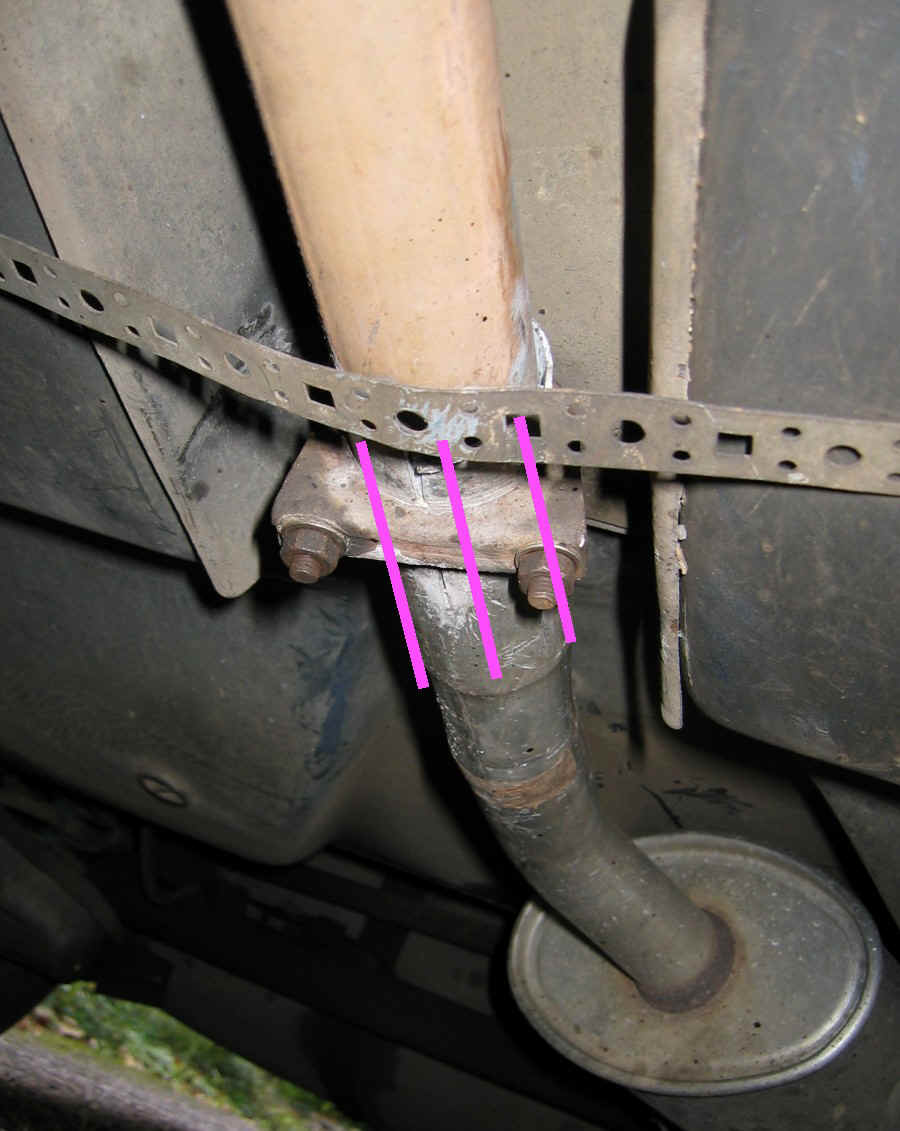 |
The connections on SAAB
exhausts are claimed to be easy to dismantle. This is true but only when three long cuts
are made with a 1mm thick cutting disc used in an angle grinder and the outer pipe 'opened
out'. Take care to cut through only the outer pipe - not the inner layer. Also take care
with sparks flying onto the nearby petrol tank. |
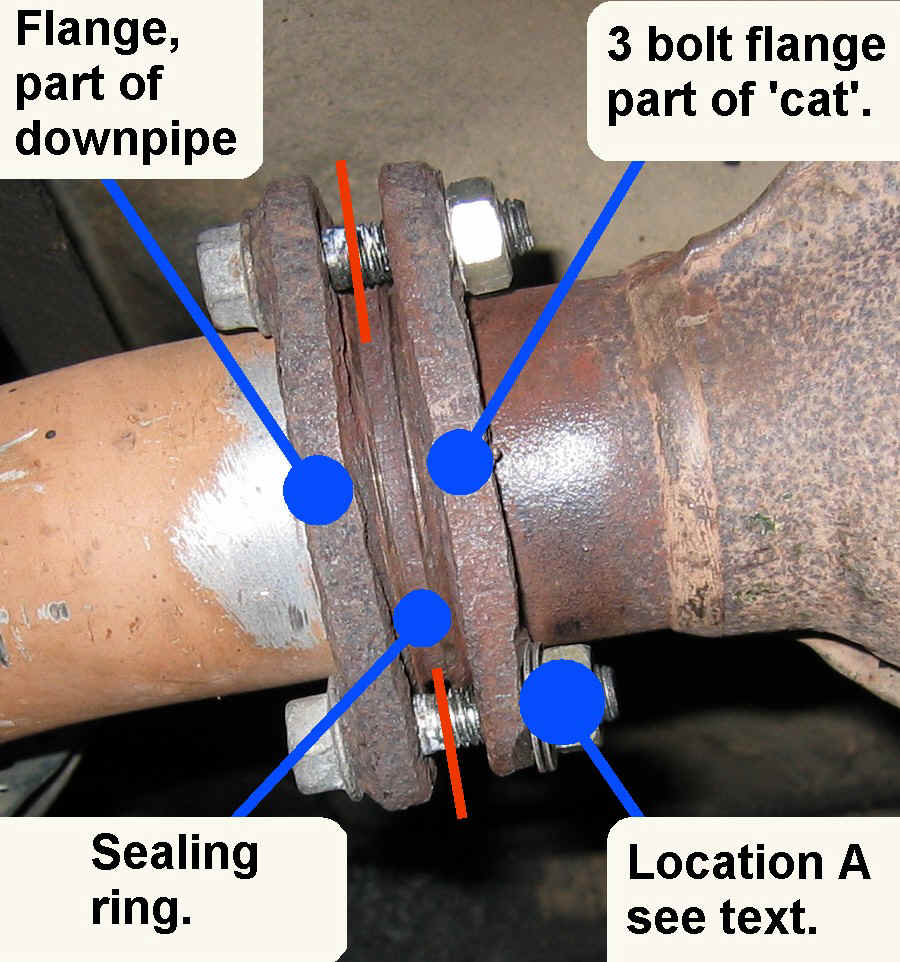 |
The bolts originally used to
secure the front flange of the catalyst to the downpipe are very difficult to remove. They
are splined bolts, very firmly pressed and corroded into the flange at location A. Removal
entails cutting two of the bolts as shown (in red) using a saw or a thin cutting disc in
an angle grinder. This loosens the flanges so they can be rotated to give access to cut
through the third bolt.
The catalyst can then be removed but the remains of the splined bolts will still be
very firmly secured into the flange that is a part of the catalyst.
In practice knocking out these bolts with a hammer ands (with a corner of the flange
supported on vice jaws) proved impossible owing in part to the need to avoid shocks to the
catalyst. The bolts were drilled out in a lengthy process using first a 2mm drill,
increasing to 8mm.
The sealing ring can be cleaned with a power wire brush and reused.
The orientation of the flanges should be parallel with an equal 'gap' all around the
diameter of the pipes.
Removal of the splined bolts is the only difficult part of the work shown here.
New bolts should be tightened progressively and not overtightened. |
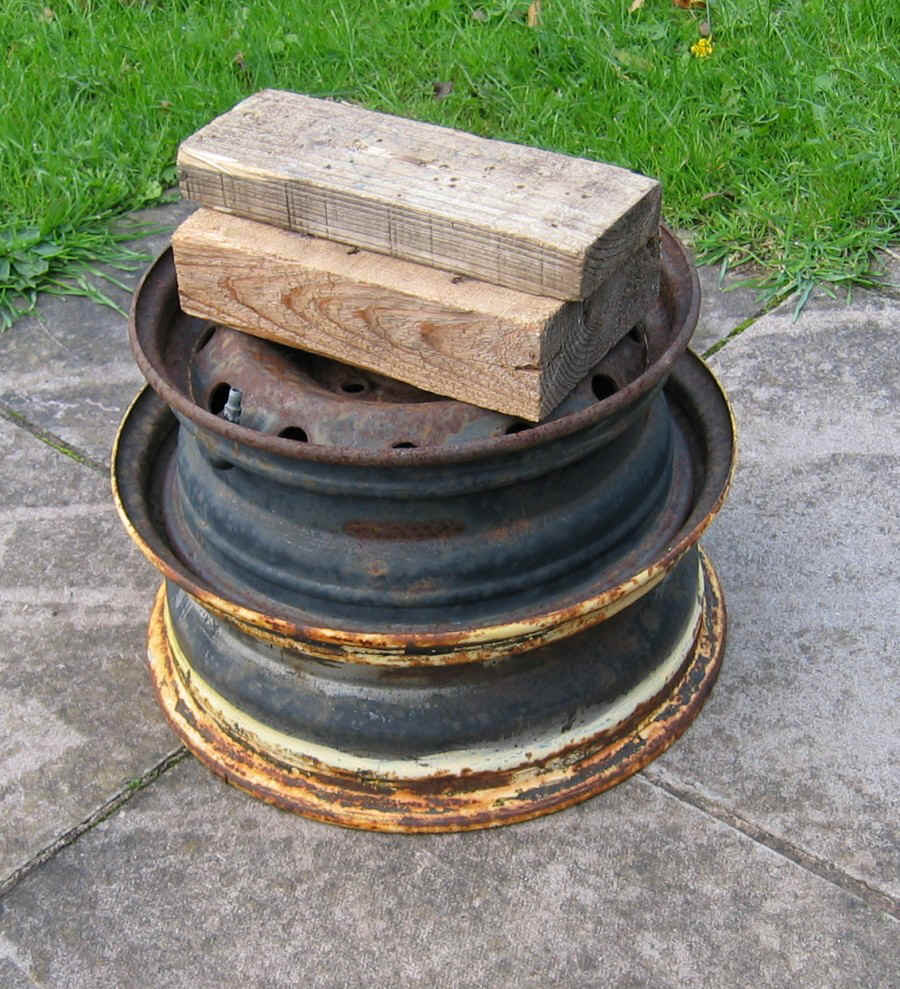 |
Finally, with the front of a
car on large ramps, the rear can be jacked up and supported under jacking points by old
wheels. This is a far safer means of support than using axle stands when you need access
to both ends of a car at the same time. The lower wheel is 15" (from a Saab), the
upper a 13" from an old Fiesta. These fit neatly into each other and provide a very
secure platform on which can be supported wood blocks as shown. |
Home page